Push Notification With Firebase Cloud Message
Đó là một ngày tìm hiểu về cách build core push notification cho apps, và sau khi build xong thì không biết test thế nào, cuối cùng lại tự mình build app Android test chức năng push notification, vì thế mới có bài viết này.
Fresher Dev Android viết bài này nên ai đó thấy mình viết sai gì, nhớ ý kiến góp ý.
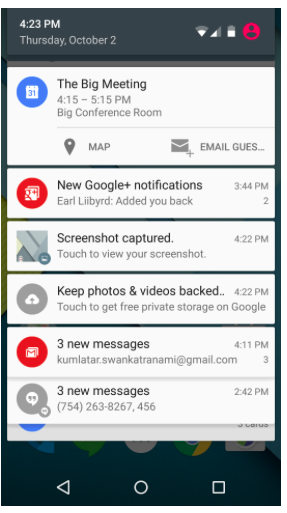 Đây là màn hình ví dụ về push notification trong android.
Nào cùng bắt đầu thực hiện
Step 1 :
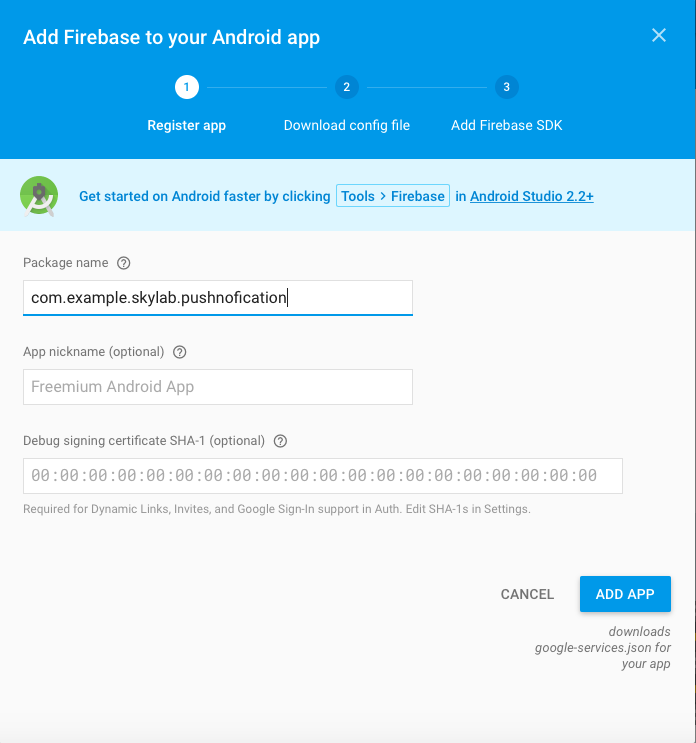
Do dùng Push notification của Firebase nên ta sẽ phải đăng ký app với Firebase ở địa chỉ : https://console.firebase.google.com
 Download file google_services.json và save trong thư mục app của project
Add Firebase SDK
Download file google_services.json và save trong thư mục app của project
Add Firebase SDK
- Add cuối file < project >/app/build.gradle
apply plugin: 'com.google.gms.google-services' - Add to file < project >/build.gradle
dependencies { classpath 'com.google.gms:google-services:3.0.0' } - Ngoài ra để có thêm vài Class trong việc nhận message thì cần thêm vào mục dependencies trong file < project > / app / build.gradle compile google firebase message như sau
compile 'com.google.firebase:firebase-messaging:9.0.2' - Sau khi sửa đổi thì ta sync gradle để app link tới Firebase
Step 2 :
Tạo class extends class FirebaseInstanceIdService của Firebase để đăng ký Id Device khi mở app và gửi lên server để nhận được notification.
public class FirebaseInitToken extends FirebaseInstanceIdService {

    @Override
    public void onCreate()
    {
        String CurrentToken = FirebaseInstanceId.getInstance().getToken();
        Log.d("TOKEN", "Current token : " + CurrentToken);
        super.onCreate();
    }

    @Override
    public void onTokenRefresh() {
        String refreshedToken = FirebaseInstanceId.getInstance().getToken();
        Log.d("TOKEN", "Refreshed token : " + refreshedToken);

        //sendRegistrationToServer(refreshedToken);
    }
}
Với hàm onCreate lấy Token khi sử dụng Services và onTokenRefresh lấy Token khi Token thay đổi. Sau khi lấy được token ta có thể gửi Token lên Server để đăng ký nhận notification thông qua Token đó
Step 3 :
Setup start Services FirebaseInitToken trên MainActivity
public class MainActivity extends AppCompatActivity {

    @Override
    protected void onCreate(Bundle savedInstanceState) {
        super.onCreate(savedInstanceState);
        setContentView(R.layout.activity_main);
        FirebaseInitToken firebaseInitToken = new FirebaseInitToken();
        Intent intent = new Intent(getApplicationContext(),firebaseInitToken.getClass());
        startService(intent);
    }
}
Step 4 :
Tạo class extends class FirebaseMessagingService của Firebase để xử lý Message khi được Firebase send tới.
public class FirebasePushMessage extends FirebaseMessagingService {
    public FirebasePushMessage() {
    }

    @Override
    public void onMessageReceived(RemoteMessage remoteMessage) {
        // TODO(developer): Handle FCM messages here.
        // Not getting messages here? See why this may be: https://goo.gl/39bRNJ
        Log.d("Message", "From: " + remoteMessage.getFrom());

        // Check if message contains a data payload.
        if (remoteMessage.getData().size() > 0) {
            Log.d("Message", "Message data payload: " + remoteMessage.getData());
        }

        // Check if message contains a notification payload.
        if (remoteMessage.getNotification() != null) {
            Log.d("Message", "Message Notification Body: " + remoteMessage.getNotification().getBody());
        }
        createNotification(remoteMessage.getNotification().getBody());
        // Also if you intend on generating your own notifications as a result of a received FCM
        // message, here is where that should be initiated. See sendNotification method below.
    }

    private void createNotification( String messageBody) {
        Intent intent = new Intent( this , ResultActivity. class );
        intent.addFlags(Intent.FLAG_ACTIVITY_CLEAR_TOP);
        PendingIntent resultIntent = PendingIntent.getActivity( this , 0, intent,
                PendingIntent.FLAG_ONE_SHOT);

        Uri notificationSoundURI = RingtoneManager.getDefaultUri(RingtoneManager.TYPE_NOTIFICATION);
        NotificationCompat.Builder mNotificationBuilder = new NotificationCompat.Builder( this)
                .setSmallIcon(R.mipmap.ic_launcher)
                .setContentTitle("Android Firebase Cloud Message")
                .setContentText(messageBody)
                .setAutoCancel( true )
                .setSound(notificationSoundURI)
                .setContentIntent(resultIntent);

        NotificationManager notificationManager =
                (NotificationManager) getSystemService(Context.NOTIFICATION_SERVICE);

        notificationManager.notify(0, mNotificationBuilder.build());
    }
}
Tuỳ vào cấu trúc message trên server send về cho app như thế nào thì ta sẽ nhận message như thế. Trong trường hợp này cấu trúc message gồm
{
    "from" : 694149759499,
    "payload" : {
        "key1" : "value1",
        "key2" : "value2"
    }
    "notification" : {
        "title" : "Test push",
        "body"  : "Push notification"
    }
}
Và hàm createNofitication push notification lên app Android và set Intent nhận vào khi click zo notification chuyển sang một Activity nào đó như trong trường hợp này là ResultActivity
Step 5 :
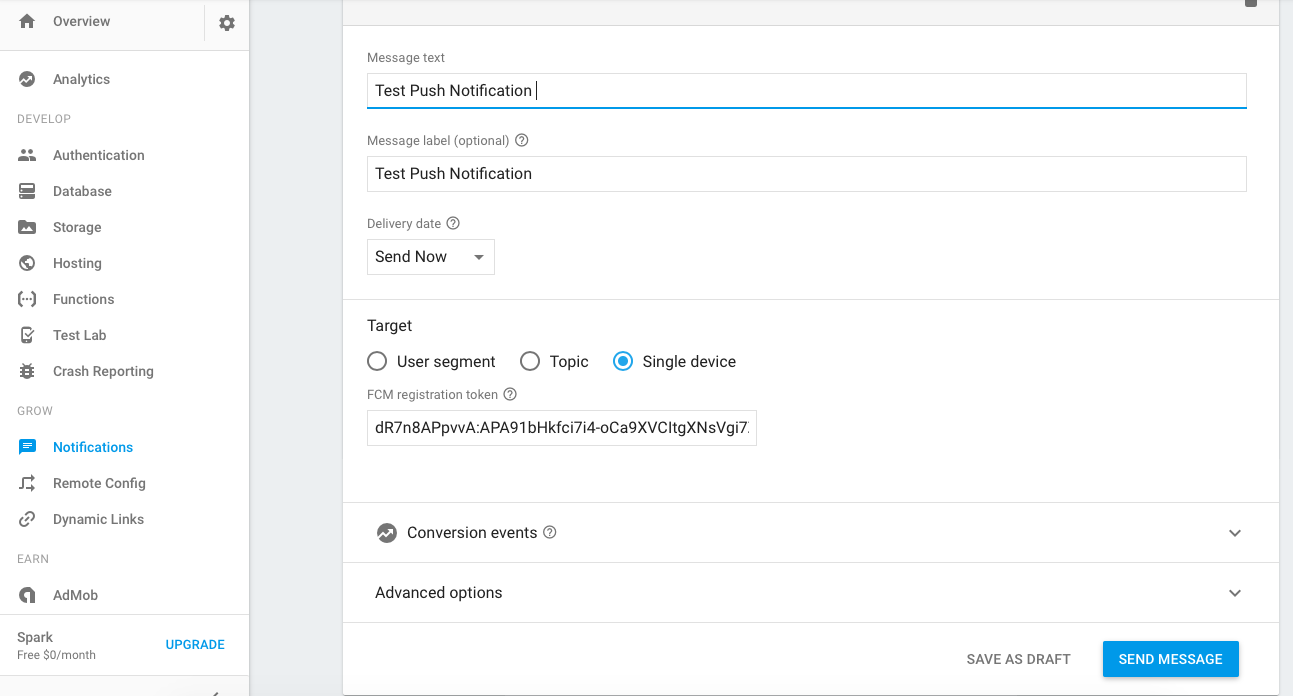
Và tới đây là chúng ta có thể nhận message để push lên device . Để test ta có thể vào lại firebase console : https://console.firebase.google.com Trong mục Notification, và gửi đi message tuỳ ý tới device của mình thông qua Device Token mà khi mở app Device Tạo ra thông qua Service FirebaseInitToken mà chúng ta tạo ở trên
Sau đó ta kiểm tra kết quả trên divice
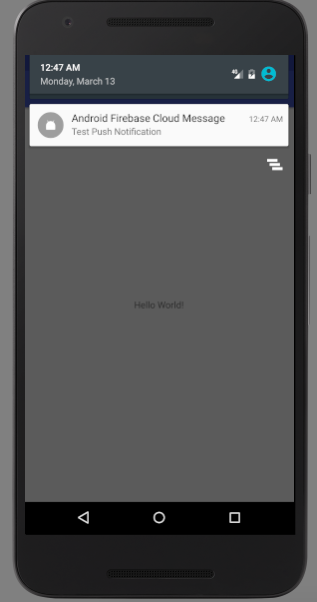
Như vậy là ta đã thành công
Tới đây xin phép được kết thúc, chúc các bạn thành công!
ThienLP